Camera tips and use for astronomy
Focus.
This is harder than you might think but critical. Pick a bright star or the moon centre it and use live view.
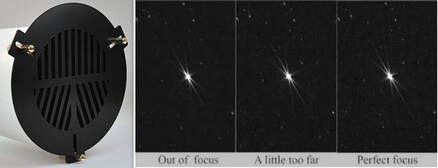
Zoom in as much as you can and get the sharpest focus, take a test shot and zoom in to confirm (you can get more zoom in this way). Whether using a telescope or a lens a Bathinov mask will aid greatly in getting the best focus.
If you can lock focus at this point, do so, but check focus again (on some scopes the focus will shift slightly when you tighten the lock screw). On a lens you can apply some low tack tape to hold it (do not use autofocus, set lens to manual BEFORE you attempt to focus, many lenses can easily be damaged if you force them when in auto mode). On a long refractor that is cooling, re-check the focus, the tube may contract in length and change focus. Always best to set up when the scope has cooled and is at the ambient temperature.
If you use a clip-in filter re-focus after you have added it, the extra glass will shift the focus.
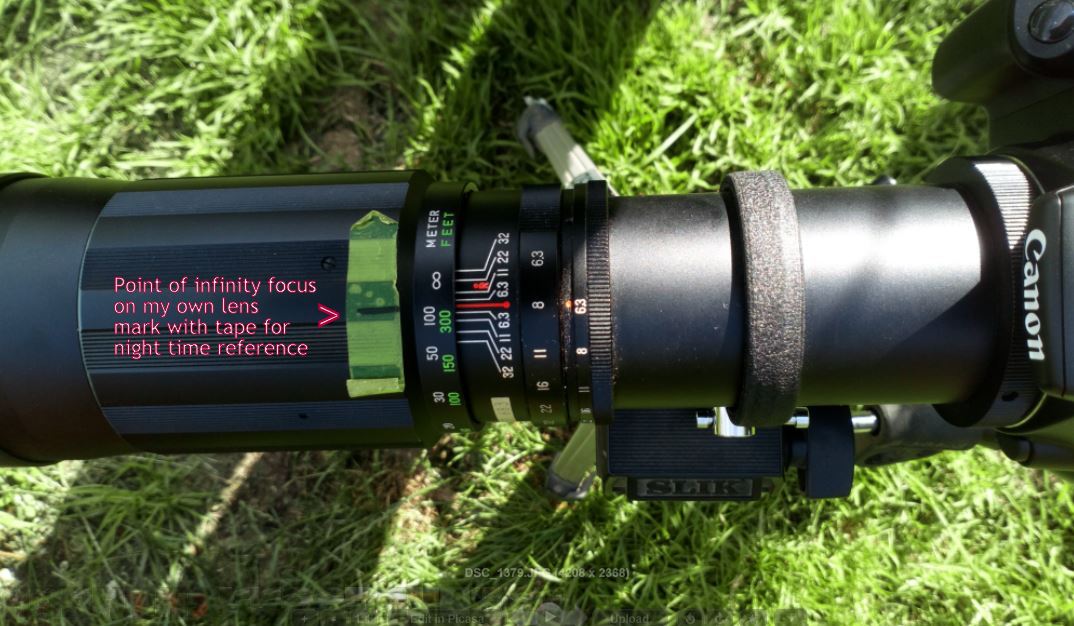
On a lens it can be very dark and particularly difficult as a smaller diameter and/or higher f number can make your targets very faint. On a moonlit night target the limb of the moon and get the sharpest focus you possibly can. Using some low tack masking tape (will not harm lens) mark this position. Next time you use the lens place it on this mark and you will be halfway there, use a test shot to confirm and adjust as necessary. Do not rely on the infinity mark. Using a higher f stop can sharpen the image at the expense of a longer exposure. Use 1 stop below the maximum or a little more.
Older manual prime (non zoom) lenses can be useful for astrophotography, the lower the f-number the better a 135mm on an APS-C sensor camera is equivalent to a (135 x 1.6) 216mm lens, full frame is unchanged.
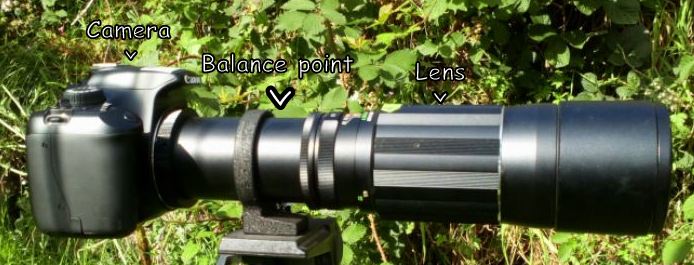
If your lens has a mounting bracket, use it to remove excessive stress from your camera's bayonet mount, you can also use this to balance the camera/lens on your mount by adjusting the position.
If your lens has a mounting bracket, use it to remove excessive stress from your camera's bayonet mount, you can also use this to balance the camera/lens on your mount by adjusting the position.
Often M42 or T mount lenses can be purchased cheaply, adapters are required to fit a Canon eos. These do add an extra distance to the lens spacing and if your lens will not turn beyond infinity you may find that you cannot achieve focus.
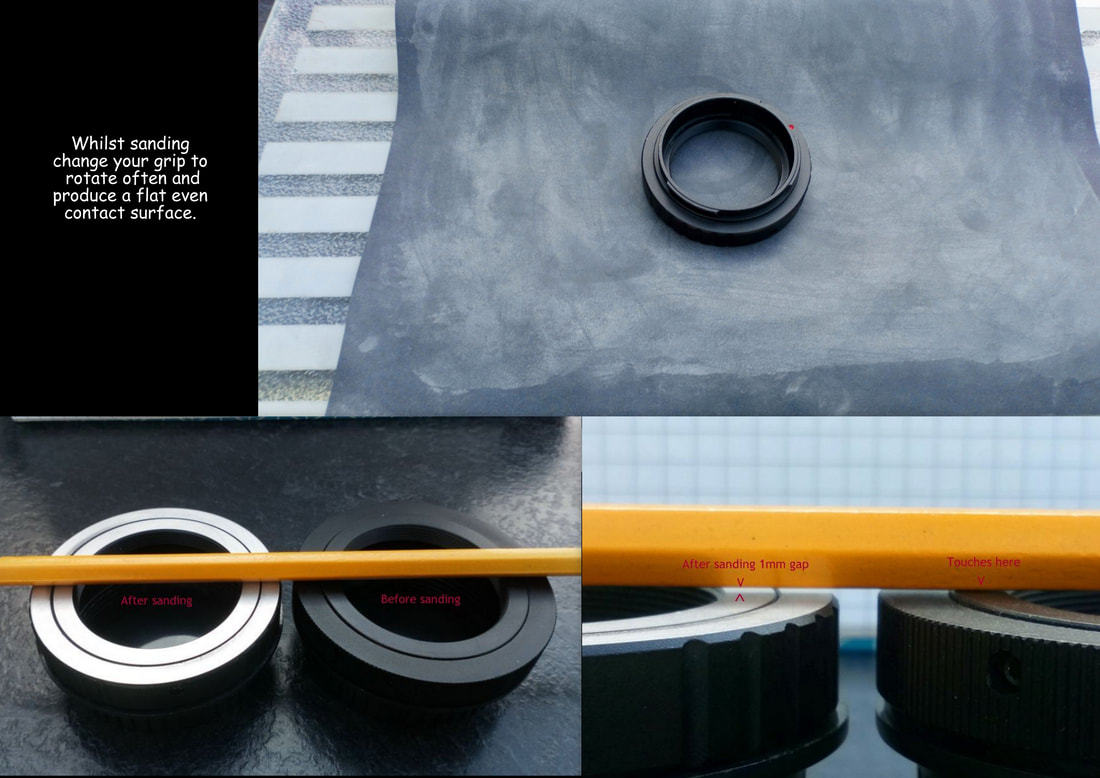
In this case the adapter may be sanded down to reduce the distance, only a small amount may be needed, less than 0.5mm.
Place the adapter bayonet side up on a piece of 200 grit wet and dry on a perfectly flat surface (sheet of glass - I used the underside of a glass chopping board). Sand in a circular motion and change your grip to rotate the adapter often to keep it even. Sanding with a little water will procuce a better finish. Throughly clean before fitting to your lens.
Why go to all this bother?
Consider that an f2.8 135mm m42 lens can be had for £20, the adapter is less than £5.
Use the money you saved for a motorized mount or tracker and you can start producing good results.
A cheap short tubed refractor can also be used to start with and if you make a perfectly circular mask to reduce the aperature a little, you will get sharper stars with less halos . The free program GIMP has a tool that can correct lens distortion while you save for a flattener (necessary for short tube refractors).
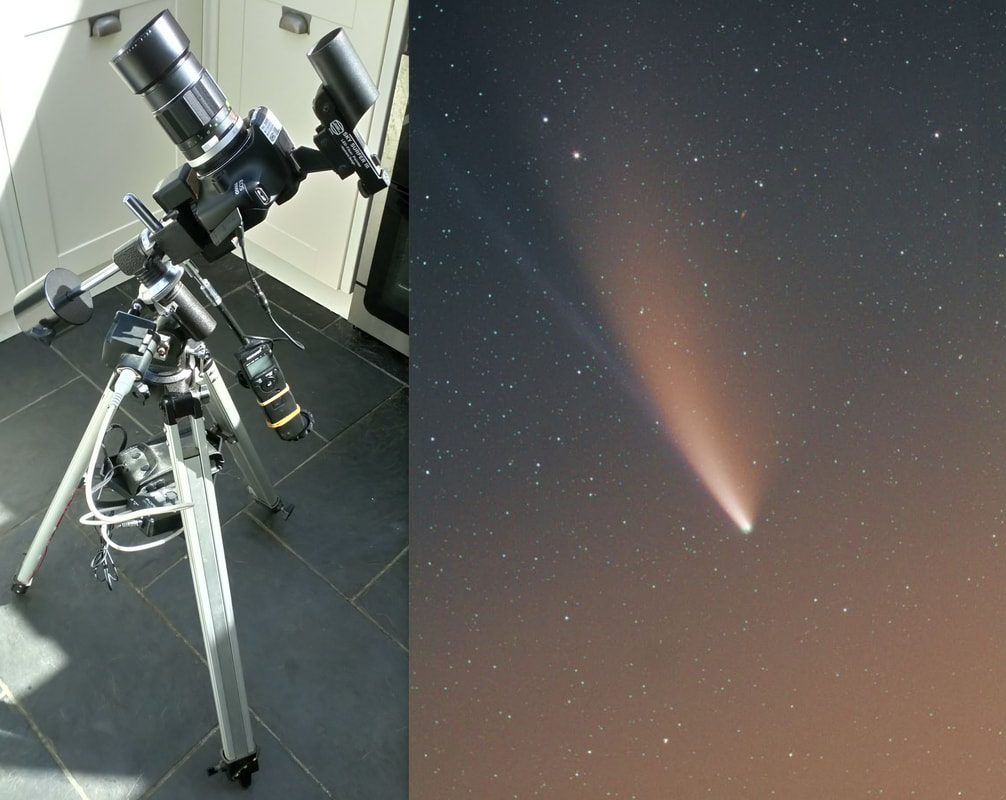
Above is an example of a minimal astrophotography set up for long exposure, tracked images, and the shot of comet Neowise taken with it. Note the 135mm M42 lens, a programmable remote shutter release (intervalometer), on (in this case) a motorised EQ1 mount. The red dot finder helps to aim as very little can be seen through the camera. 70 sec exposures were taken to add up to 44mins total exposure.
If you only have a fixed tripod you can use the 500 rule to calculate the maximum exposure, without creating star trails.
To do this you divide 500 by your (calculated for APSC) focal length, in this case 216mm (135x1.6), so 500/216 = 2.3 secs, though I did get ok results at 5 secs (low down to the North) it will depend how far from polaris you are- the further, the more movement as the Earth rotates.
Either way aim for at least 10 'darks' (same exposure/temp/iso wih lens cap on-shows 'bad'pixels) and 50 'lights' to stack in Deep Sky Stacker or similar . I have stacked only 6, but the more the merrier. Even if you take 50 you will end up rejecting some due to tracking errors/satellites/etc. A flapping camera strap can cause many errors, remove it or rubber band it out of the way.
The ISO will depend on the camera being used and the target, use the highest you can without excessive 'noise' in the image.

